|
Offer a template to make wig cap?
Off-the-rack wigs are generally one-size fits all, but for a custom-made wig, the wig maker needs your exact measurements.
Normally you measure the size by yourself according to the measurements guide, but if you want your cap more fitted and comfortable avoid making mistake when taking measurement , the best way is to do a template . The ideal wig template is a mold or cast of your entire hairline to allow for the best, most natural-looking, fit.
How to Make a Template of Your Head for a Wig?
Instructions
1.Style your hair the way you would wear it under your wig. Ideally you should choose a flat hairstyle that makes it easy to distinguish your hairline. Skip this step if you are bald.
2.Drape a large piece of plastic wrap over your head. The wrap should hang down to the top of your nose in the front, your ear lobes on the sides, and to the base of your neck in back. If one single sheet is not big enough, tape two sheets together.
3. Pull the plastic taut to prevent any wrinkles and wrap the packing tape around your head starting at the forehead and around the widest part of your head. The plastic wrap should resemble a hat.
4.Trace your hairline onto the plastic with a quick-drying permanent marker. You want a marker that will not smudge or rub off onto the plastic.
5.Apply one strip of tape on the center of the plastic from your forehead, just above the brow line, to just below the nape of your neck.
6.Apply a second strip of tape across the top of your head from ear to ear.
7.Continue applying tape, front-to-back and side-to-side, until the plastic is covered. The taped plastic should resemble a helmet.
8.Remove the plastic from your head. If desired, apply tape to the inside to reinforce the template.
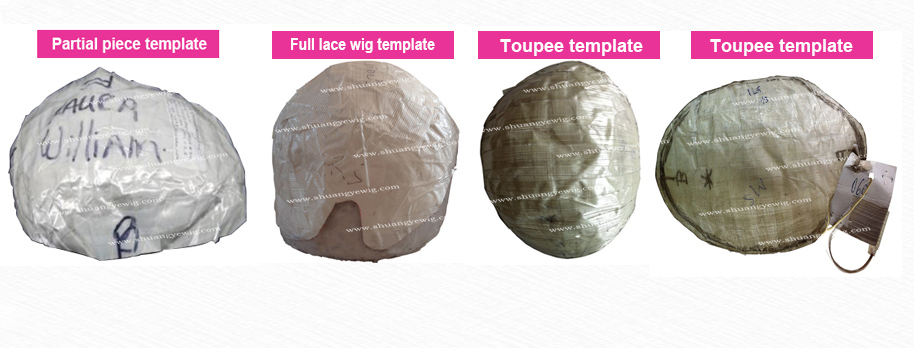
9.Cut around the drawn-on hairline to remove the excess plastic. Label the front of the template with an “F” and the back with a “B” and write your name across the top from ear to ear with the smudge-proof marker
See examples of template customer made below
|